We have just uploaded Part XII of ‘Suspension Techniques’ making this the most in-depth shibari suspension course ever! These are not just 10 minute YouTube demonstrations but full multi-media tutorials with every step shown and explained in detail. You’ll learn not just the ties but the engineering behind them in the ‘Suspension Techniques’ series.
Here are some clips from a demonstration of the sequence in the latest tutorial. This is merely part of the supporting content. The actual tutorial has a full commentary and close-ups with every step explained.
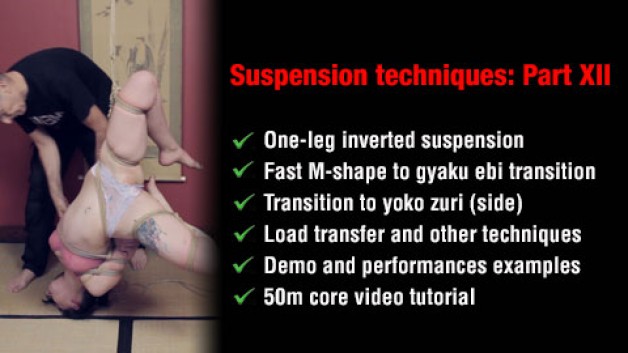
In Part XII, we will cover a sequence of transitions and further explore transferring suspension load. In this case. I will be using Nina’s technique of connecting into a gun-slinger style harness to achieve a user-friendly inverted one-leg suspension. To reach this position, you will learn a transition from gyaku-ebi zuri (a demanding face-down) in to a side suspension (yoko zuri). I will show you two ways to move into gyaku-ebi zuri. The spectacular way is a lightning fast transition from an M-shape suspension which is perfect for performances. I also take you through a more basic version which simply requires the legs to be lifted into position.
- Gyaku ebi zuri (a face-down suspension)
- One-leg inversion
- Yoko zuri variant (side suspension)
- M-shape suspension
- Transitions
If you skipped some of the earlier parts in the series, I strongly recommend studying them before going further. Part IV is particularly relevant as it covers the M-shape suspension in detail. In any case, an understanding of suspension basics and the ability to tie a suspension capable gote (TK) is a minimum requirement.
In addition to the main tutorials, we include:
- X-friction tutorial
- Vital information on gote tension
- Performance example
- One-handed suspension line pass-through